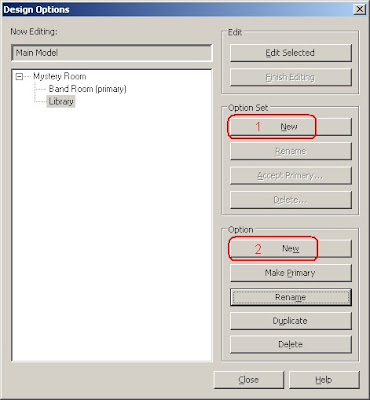
Now go to the Manage tab of the ribbon and select the Design Options tool. This will open the Design Option dialog. There, a option set can be defined with options under that set. To create a new set, click the new button under Option Set circled below in red with the number 1. Option 1 will automatically appear under this set. To rename the set and the option, highlight them on the left then select the appropriate rename button on the right. rename the set to "Mystery Room" and Option 1 to "Band Room". Create a second option by selecting the New button under Option circled below in red with the number 2. Rename that option to "Library".
With the options setup, the visibility graphics for the two views created earlier can be set to show just the desired option. A Design Options tab has been added to the Visibility Graphics dialog. In each of the two views, change the design option to match the view.

 Below is an image of the two views. If objects are showing up in both views, Select the objects and use the Add to Set button to deselect the view it should not be in.
No comments:
Post a Comment